Snow Chains in Sequoia National Park: What You Need to Know
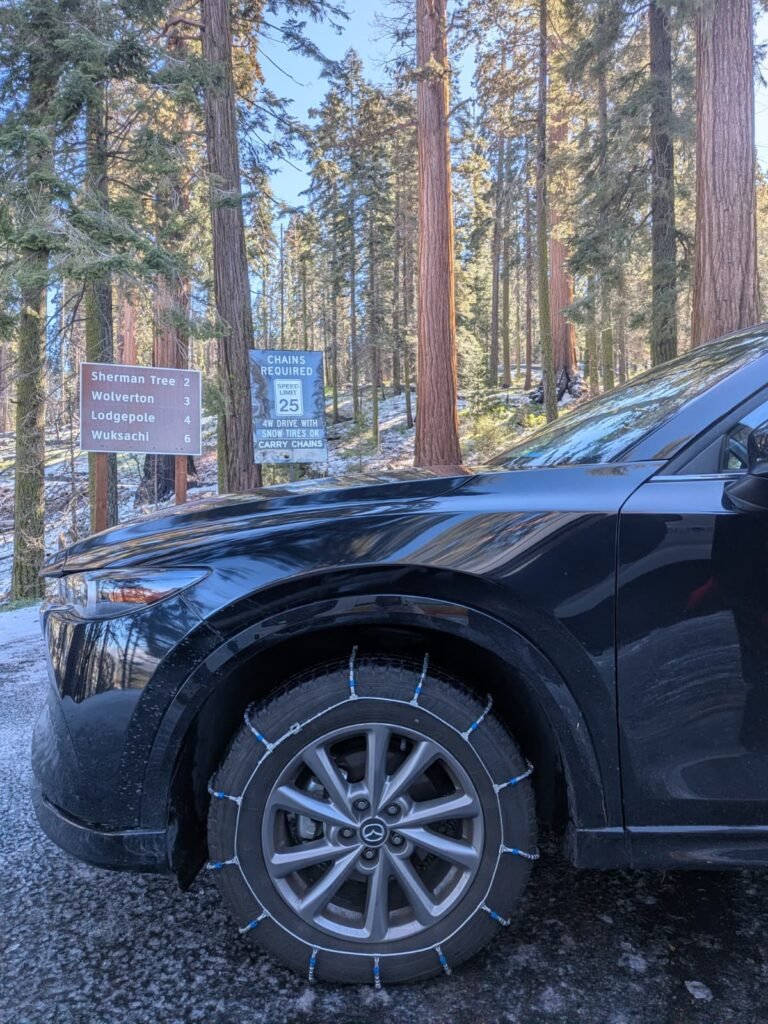
If you’re planning a winter adventure in Sequoia National Park, there is one thing you should understand before you head into the mountains: snow chains aren’t something you want to think about for the first time when you’re already sitting in a snowstorm.
We learned quickly that winter conditions in Sequoia can change fast. One minute the road can be clear, and the next you’re surrounded by snow and ice with chain-control signs telling you to prepare for winter driving.
Even if you have a 4WD or AWD vehicle, you should still understand the rules and carry properly sized chains or cables. The National Park Service recommends carrying them during fall through spring because chain requirements can change rapidly with weather and road conditions.
Here’s what we learned about navigating winter roads in Sequoia.
First: Watch the Park Updates
Before heading into Sequoia, make checking the current road conditions and park alerts part of your routine. Don’t just check the weather forecast. A weather app might tell you that snow is expected, but the National Park Service is the place to find out whether that snow has actually resulted in road closures or chain controls.
The NPS says that a park alert will be posted whenever chains are required, and its Road Conditions page provides information about areas where vehicle chains are required. Entrance stations and visitor centers also have the most current and specific information.
The park also provides a 24-hour road information line: Sequoia & Kings Canyon Road Conditions: (559) 565-3341. The NPS notes that you can press 1, then 1 again for current road conditions.
And don’t check just once in the morning. Check again before leaving your hotel, again before entering the park, and again if the weather changes. Conditions can change multiple times throughout the day.
How Will You Know If Chains Are Required?
You’ll see chain-control signs along the roadway when restrictions are in effect. These signs tell you what level of traction requirement is currently being enforced and where you need to pull over to install your chains.
The NPS specifically warns that conditions and chain requirements can change even after you have entered the park. You may not need chains when you enter and find that they are required later. That’s why carrying them is so important.
Having 4WD doesn’t mean you can simply leave the chains at home. When chain controls are active, all vehicles must carry chains or cables, including 4WD and AWD vehicles.
Understanding R-1, R-2 and R-3
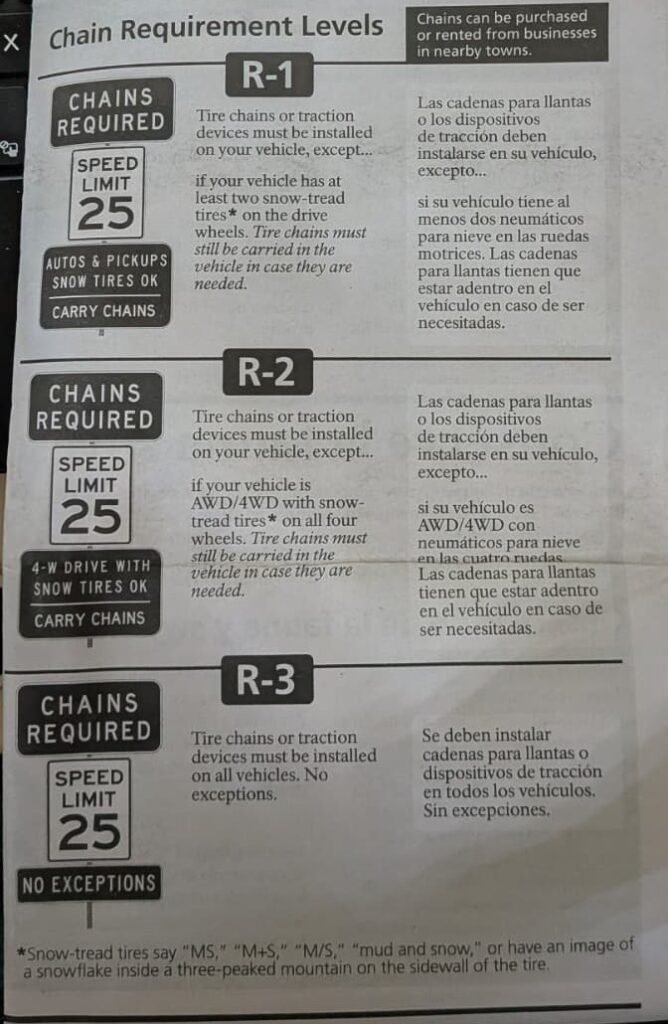
You’ll often hear California’s chain requirements referred to as R-1, R-2 and R-3. For Sequoia, the NPS describes them as follows:
R-1 — Chains Required Unless You Have Snow Tires
Chains or traction devices must be installed unless the vehicle has at least two snow-tread tires on the drive wheels. Even if you’re exempt from installing them, you still have to carry chains or cables.
R-2 — 4WD/AWD With Snow Tires May Be Exempt
Chains or traction devices must be installed unless you’re driving an AWD or 4WD vehicle equipped with snow-tread tires on all four wheels. Again, chains still need to be carried in the vehicle.
R-3 — Everyone Chains Up
This is the serious one. Chains or traction devices are required on every vehicle—no exceptions. Even 4WD and AWD vehicles must use chains, and the NPS states that 4WD/AWD must also be engaged. R-3 conditions are uncommon, and Caltrans notes that roads are often closed before conditions become severe enough to impose R-3.
What About 4WD?
This is where many people get confused.
You might think: “I have 4WD. I don’t need chains.”
Not necessarily. 4WD helps you maintain traction, but it doesn’t automatically exempt you from California’s chain requirements.
At R-2, a 4WD/AWD vehicle with appropriate snow tires on all four wheels can be exempt from installing chains, but it still has to carry them.
At R-3, everyone installs them.
And regardless of your vehicle, the NPS recommends carrying chains or cables during the winter season.
Renting vs. Buying Chains
If you’re traveling to Sequoia from out of town, you may be wondering whether you should buy chains before your trip or simply rent them when you arrive. There are advantages to both.
Buying
If you’re planning multiple winter mountain trips, buying a set can make sense. The biggest advantage? You can practice.
The NPS actually recommends purchasing chains before your trip so you can make sure they fit and practice installing them before you need them. That’s important because installing chains for the first time in a snowstorm, on the side of a mountain road, while your fingers are freezing is not exactly the ideal learning environment. You can also keep them in your vehicle throughout the winter and be prepared for unexpected conditions.
You are also not limited on your itinerary, especially if you plan on traveling through to different regions. You don’t want to be making round trips just to return tire chains.
Renting
If you don’t live somewhere that gets snow or you only need chains for one trip, renting may make more sense.
The NPS says chains and cables are available for rent or purchase from businesses near the parks, including vendors in Three Rivers near the Sequoia entrance. The park currently notes typical rental prices of approximately $40–$65 per day, while purchases commonly run around $50–$200, depending on the type and size.
But there’s an important catch:
Check Your Rental Car Contract
If you’re renting your vehicle, do not assume you are allowed to install chains. The NPS specifically warns that some rental-car companies prohibit the use of tire chains or cables in their rental contracts. Read the agreement before you arrive.
If you’re renting a vehicle for a winter trip, also make sure you know:
- Whether chains/cables are permitted
- What type of traction device is permitted
- Whether the vehicle has AWD/4WD
- What tires are installed
- Whether the vehicle manufacturer has restrictions on chains
Never buy a chain simply because the box says it fits your vehicle. Verify the tire size and the vehicle manufacturer’s requirements.
Practice Before You Need Them
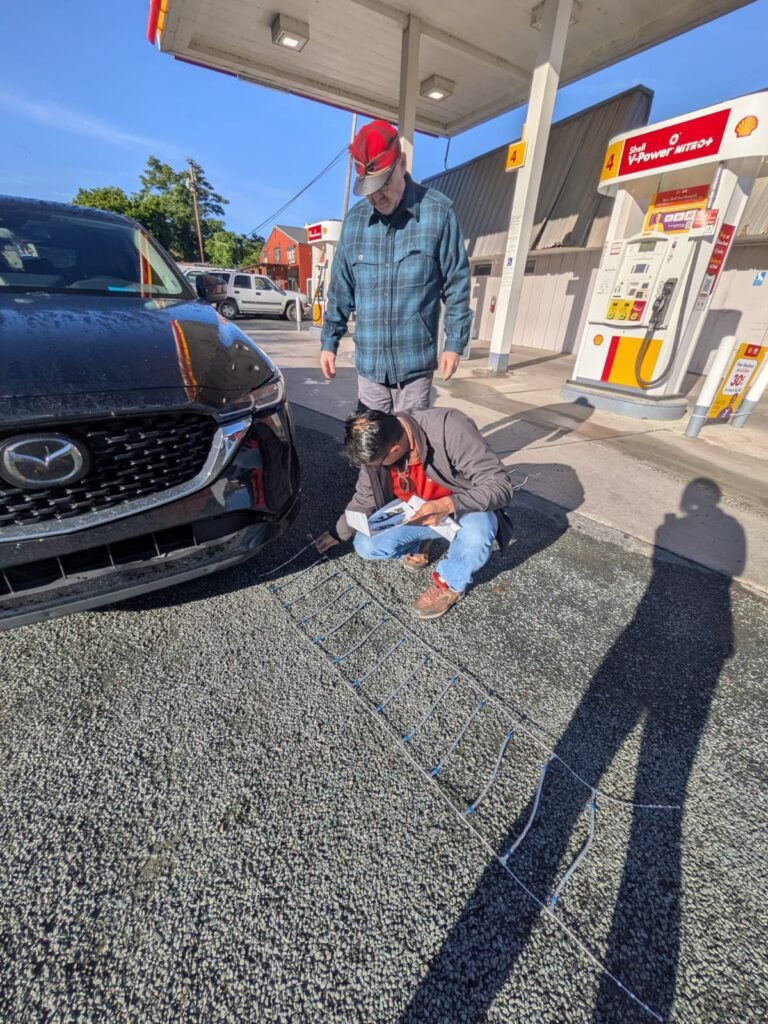
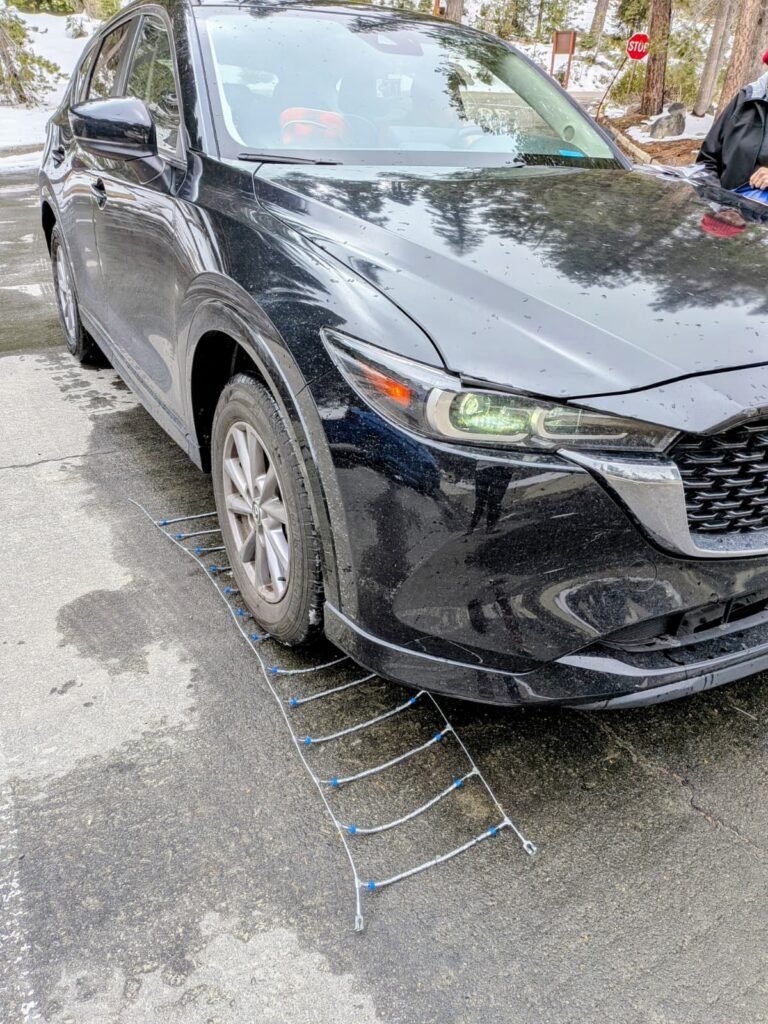
This might be the single biggest tip we’d give someone. Put the chains on in a dry area first. Don’t wait until you’re sitting beside a snowy road wondering which side of the chain goes where. Lay everything out. Read the instructions. Put them on. Take them off. Then do it again.
You want to be comfortable enough with the process that you aren’t learning it for the first time when you’re cold, wet, stressed, and surrounded by other vehicles. And make sure your chains or cables are actually the correct size for your tires.
Installing Chains on the Road
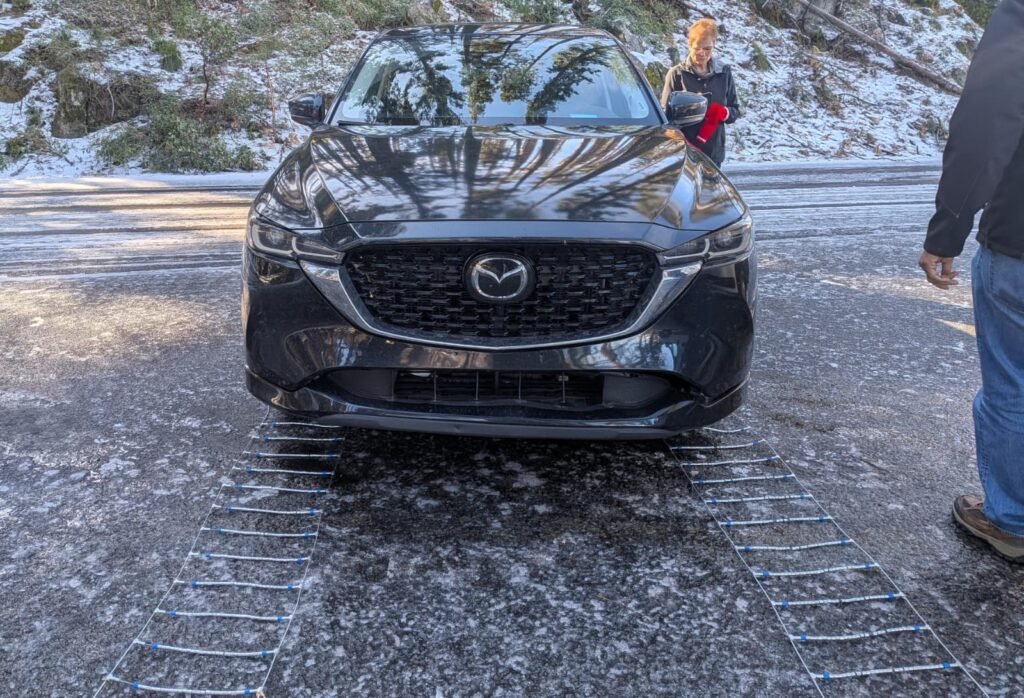
When chain controls are active, you’ll see designated areas where drivers can safely pull off and install their traction devices.
Never stop in an active traffic lane to install chains. The NPS and Caltrans both emphasize pulling completely off the roadway into a designated chain-up area, pullout, or parking area.
Before you start:
- Pull completely off the roadway.
- Turn on your hazard lights.
- Put the vehicle in park.
- Follow the chain manufacturer’s instructions.
- Make sure the chains are properly tensioned.
- Drive forward a short distance and recheck them.
- Stop and readjust if they become loose.
Driving With Chains
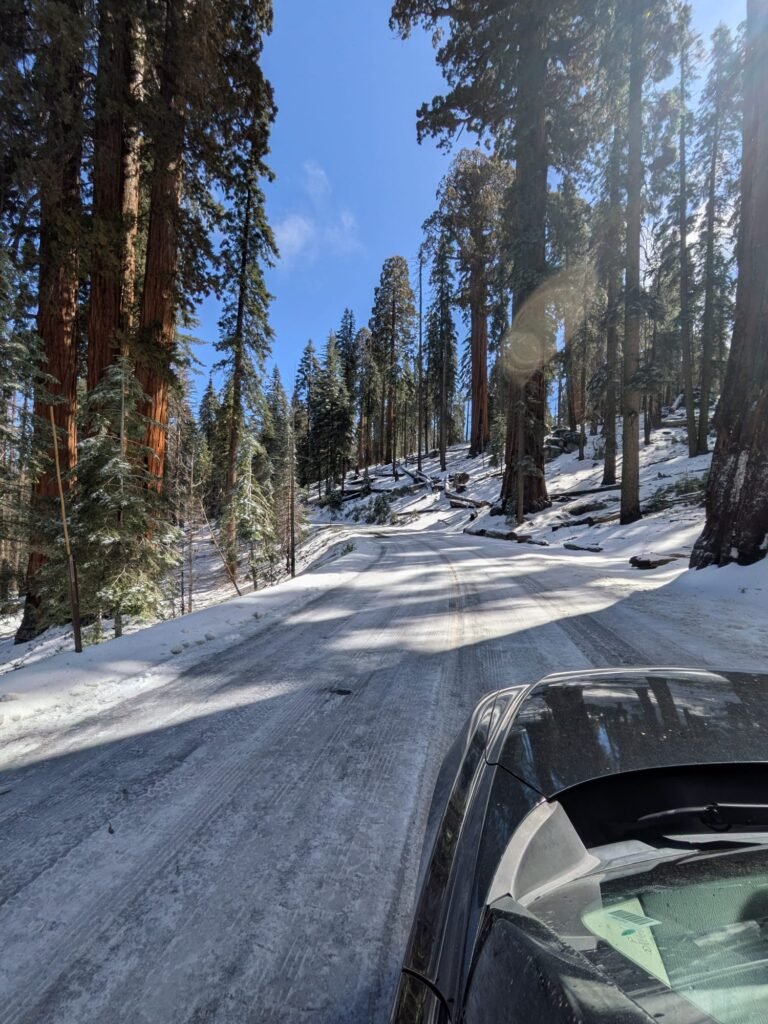
Once the chains are installed, slow down. The NPS states that the speed limit is 25 mph whenever chain requirements are in effect, regardless of the normal posted speed limit. And honestly, you may want to drive even slower depending on conditions.
Winter mountain driving isn’t the time to worry about how quickly you can get somewhere. Give yourself plenty of following distance. Avoid sudden acceleration. Avoid hard braking. Use lower gears when appropriate, particularly when traveling downhill. Keep your headlights on. Watch for ice, especially in shaded areas and on bridges. And give snowplows plenty of room.
The NPS specifically warns that even vehicles equipped with chains or 4WD can have difficulty on snowy roads.
Don't Forget to Remove Them
Chains aren’t designed to stay on your tires once you’re back on clear pavement. Once you pass the signs indicating the end of chain control, find a safe pullout and remove them. Don’t wait until you’re several miles down the road driving on bare pavement.
Caltrans specifically instructs drivers to travel beyond the “End of Chain Control” signs and then pull off safely to remove their chains.
Our Biggest Takeaway
Winter in Sequoia is absolutely incredible—but the mountains deserve respect. The snow-covered sequoias may look peaceful and magical, but getting there means being prepared for rapidly changing mountain conditions.
For us, the biggest lesson was simple:
Don’t wait until chains are required to figure out your chains.
- Know the requirements.
- Check the park alerts.
- Carry properly sized chains or cables.
- Know how to install them.
- And know how to drive with them.
Because when the snow starts falling and the chain-control signs go up, you’ll be glad you spent a little time preparing before you left home. And if the forecast is calling for a major winter storm, remember that the NPS strongly discourages attempting to travel in the parks during an active snowstorm. Sometimes the safest adventure is waiting until conditions improve.
Winter Sequoia is worth experiencing—but being prepared is what makes it possible to enjoy the journey safely.